Drip Irrigation for Apple Trees: 7 Easy Steps & Kits
Drip irrigation for apple trees delivers water slowly through emitters positioned over the roots. Set up a filtered, pressure-regulated line, distribute outlets to wet the growing root zone, and calculate runtime from measured flow. Then check soil moisture before repeating irrigation, adjusting for rainfall, soil texture, tree size, and weather.
Table of Contents
Key Takeaways
- Drip irrigation for apple trees needs adequate root-zone coverage, not just a dripping outlet beside the trunk.
- Runtime equals the intended gallons per tree divided by that tree’s combined emitter flow in gallons per hour.
- Choose expandable equipment and verify moisture below the surface before trusting a timer.
A working timer can hide a watering problem: one small patch stays wet while much of the root zone remains dry. This guide explains how to plan drip irrigation for apple trees, test the installation, and choose suitable kit components.
For the broader relationship between rainfall, tree age, and seasonal demand, start with our apple tree watering guide. Here, the focus is on turning that watering plan into a system you can measure and adjust.
How Drip Irrigation for Apple Trees Works
Emitters release water at designated points, while inline drip tubing has outlets built into the line. According to Oregon State’s drip irrigation introduction, this method applies water slowly near roots and reduces contact with leaves and fruit.
However, equipment alone does not establish a suitable watering schedule. Drip irrigation for apple trees succeeds when the delivered volume, wetted area, and interval between applications match the site.
Think about wet soil, not visible drips
Utah State advises designing tree irrigation to wet at least half the root area used in its design calculations, with broader coverage preferable. Therefore, inspect the soil between outlets as well as immediately beneath them.
Extension-based principle, paraphrased: Spread irrigation across sufficient root area and expand coverage as the tree grows. This summarizes Utah State’s tree irrigation guidance, rather than a fixed emitter count for every apple tree.
Set Up Your System in 7 Steps
1. Map the trees, water source, and mowing routes
Before buying drip irrigation for apple trees, sketch the distance from the faucet to the last tree. Also mark slopes, planting ages, and grass strips that need mowing.
Keep accessible tree loops inside planting beds where practical. For crossings or long buried supply runs, get installation advice appropriate to the site instead of leaving loose tubing across a mower’s route.
2. Check soil and drainage
Sandy soil stores less available water than finer soils, so you can’t copy irrigation intervals between gardens. Additionally, Minnesota’s apple irrigation guidance notes that dwarf-rooted, trellised apples are particularly vulnerable to drought.
For soil preparation, Penn State recommends a pH of 6.0 to 6.5 for pome fruit, guided by testing. However, drip irrigation for apple trees cannot correct poor drainage or an unsuitable soil pH.
3. Assemble compatible supply components
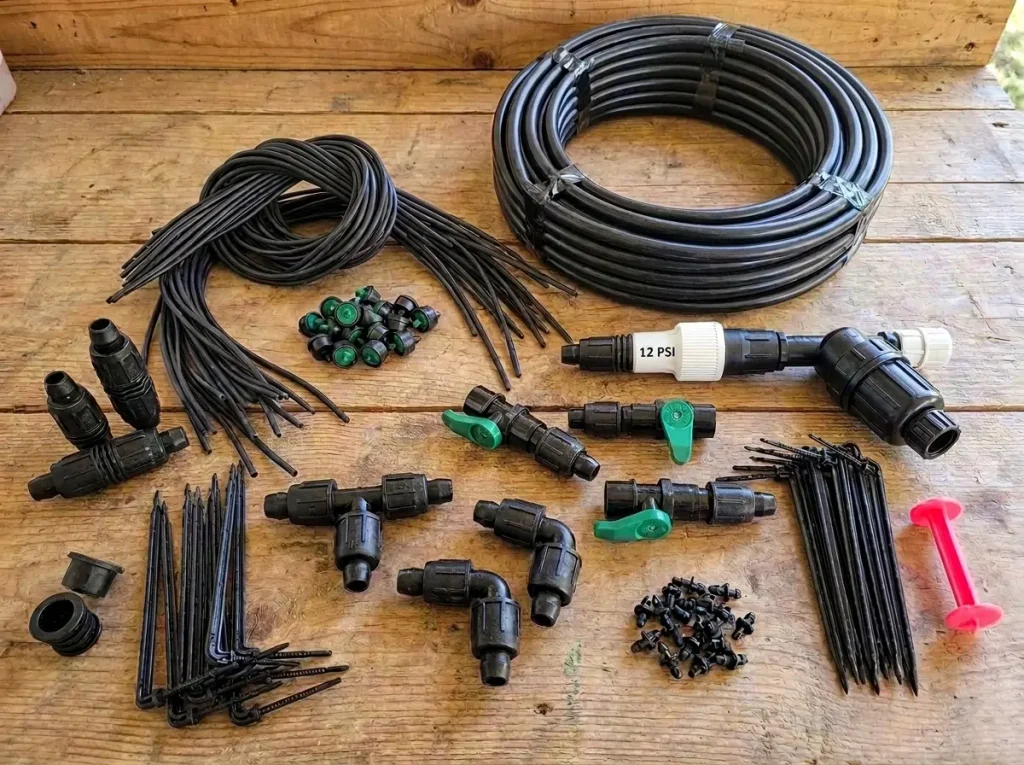
Use this shopping checklist for drip irrigation for apple trees. Before ordering, compare the kit’s instructions with the water source and intended layout.
- Backflow protection appropriate to the water connection.
- A filter matched to water quality and emitter requirements.
- A regulator matched to the system’s required pressure and flow range.
- Supply tubing, compatible fittings, emitters, stakes, and accessible flush ends.
- An optional timer, plus spare connectors and repair plugs.
Follow the specified assembly order for those components. Penn State’s system-design guide explains why filtration, pressure control, and backflow protection matter; its vegetable watering schedules do not transfer to apples.
4. Position emitters for the tree’s age
For a newly planted container-grown tree, wet the original root ball and surrounding backfill. Minnesota Extension recommends keeping both moist during establishment, so placing every outlet beyond the root ball can miss the roots you need to support.
For established trees, distribute outlets beneath the canopy instead of concentrating everything at the trunk. As roots spread, expand drip irrigation for apple trees by adding or repositioning outlets while retaining useful inner coverage.
5. Size the layout for water coverage
The right emitter count depends on tree size and how far water spreads through your soil. For example, four outlets producing four isolated wet spots may provide less useful coverage than their combined gallon total suggests.
Utah State’s backyard design guide bases emitter numbers on plant area and soil wetting. Therefore, treat a kit’s advertised tree count as a starting point for planning, not a guarantee of mature-tree coverage.
6. Flush, measure, and calculate runtime
Flush tubing before closing the ends and completing the installation. Then check for leaks and compare discharge near the beginning and end of the line.
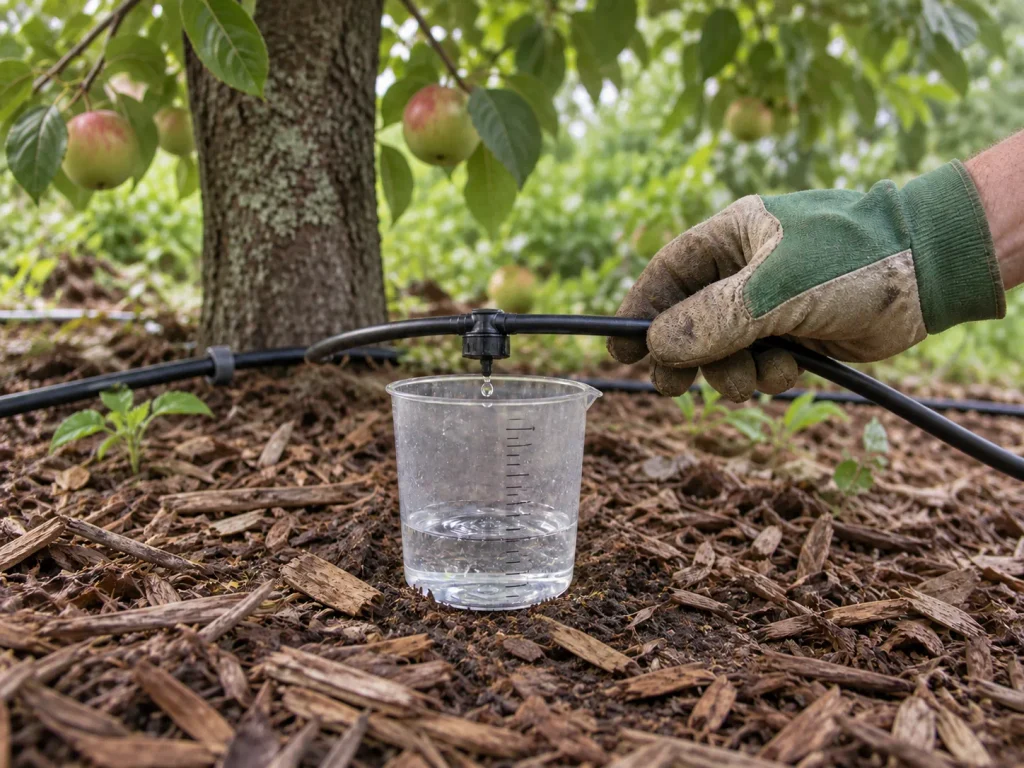
To calibrate drip irrigation for apple trees, collect water from each accessible outlet for a measured period. For example, gallons collected in 15 minutes multiplied by four gives gallons per hour; add the readings for that tree.
7. Inspect moisture before automating
After a trial run, inspect below the surface at several locations, including between outlets. Oregon State’s tree-fruit irrigation check uses a sample around 8 inches deep; this is a checkpoint, not a universal maximum rooting depth.
Once coverage is satisfactory, add mulch while keeping the root flare and trunk clear. Our apple tree mulching guide explains placement, and accessible emitters make subsequent inspections easier.
Best Kit Configurations for Different Gardens
The best kit for drip irrigation for apple trees is one that fits your layout and can expand. These are component-based recommendations derived from extension design principles, rather than brand rankings or claims of hands-on testing.
| Garden situation | Useful kit configuration | Check before buying |
|---|---|---|
| A few separated backyard trees | Expandable point-source kit with individual emitters | Enough supply tubing and outlets for each root zone |
| Trees in a continuous planting bed | Durable inline drip tubing arranged for overlapping coverage | Emitter spacing, total flow, and permitted line length |
| A sloping site or longer orchard row | Pressure-compensating emitters with appropriately sized supply lines | Operating pressure at the far end and capacity for separate zones |
Compare the complete installation cost
For each candidate kit, write down what is included, what must be added, and what future expansion requires. This makes drip irrigation for apple trees easier to budget than comparing the box price alone.
Additionally, ask whether replacement fittings and emitters are readily available. Pressure-compensating equipment still needs its specified operating pressure, so a long run or gravity tank deserves a separate suitability check.
Calculate How Long to Run the System
A worked example for drip irrigation for apple trees
Runtime in hours = planned gallons for one tree ÷ measured gallons per hour for that tree. Importantly, this calculates delivery time after you establish a water target; it does not determine the tree’s biological water requirement.
For an arithmetic example only, suppose four emitters each deliver 1 gallon per hour, and the chosen application is 8 gallons. Combined flow is 4 gallons per hour, so runtime is 8 ÷ 4 = 2 hours.
Separate runtime from watering frequency
If those four outlets each deliver 2 gallons per hour, the same example takes one hour. However, neither result means every apple tree needs 8 gallons or should be watered every day.
Use soil observations and the guide to how often to water apple trees to choose the next watering interval. For drip irrigation for apple trees, record the date, rain, runtime, measured flow, and soil condition so adjustments have a clear basis.
Check the arithmetic for a shared zone
Suppose two trees each have four measured 1-gallon-per-hour emitters operating together. The zone delivers 8 gallons per hour in total, but each tree still receives only 4 gallons per hour.
Therefore, supplying the example’s 8 gallons to each tree takes two hours and uses 16 gallons overall. Dividing one tree’s target by the whole zone’s flow would incorrectly halve the runtime.
Label your notes with both per-tree and whole-zone figures when planning drip irrigation for apple trees. If trees in the same zone need different watering intervals, consider separate controls; changing emitter flow changes the delivered quantity but does not create an independent schedule.
Adjust Watering and Troubleshoot Problems
Respond to weather and root development
Newly planted trees need closer moisture monitoring than established trees. Meanwhile, rainfall and the soil’s stored water must be considered alongside irrigation when estimating apple water needs.
During hot, dry conditions, check whether the existing schedule still reaches the roots adequately. After rain, inspect before skipping or repeating a cycle; drip irrigation for apple trees should respond to actual soil conditions.
Distinguish dry gaps from excess water
If soil is moist beneath emitters but dry between them, investigate coverage before simply extending runtime. Conversely, persistent sogginess calls for a pause and drainage assessment, not another automatic watering cycle.
Compare overwatered apple tree symptoms with apple tree drought stress symptoms, then inspect the soil and equipment. Leaf appearance alone should not determine a change to drip irrigation for apple trees.
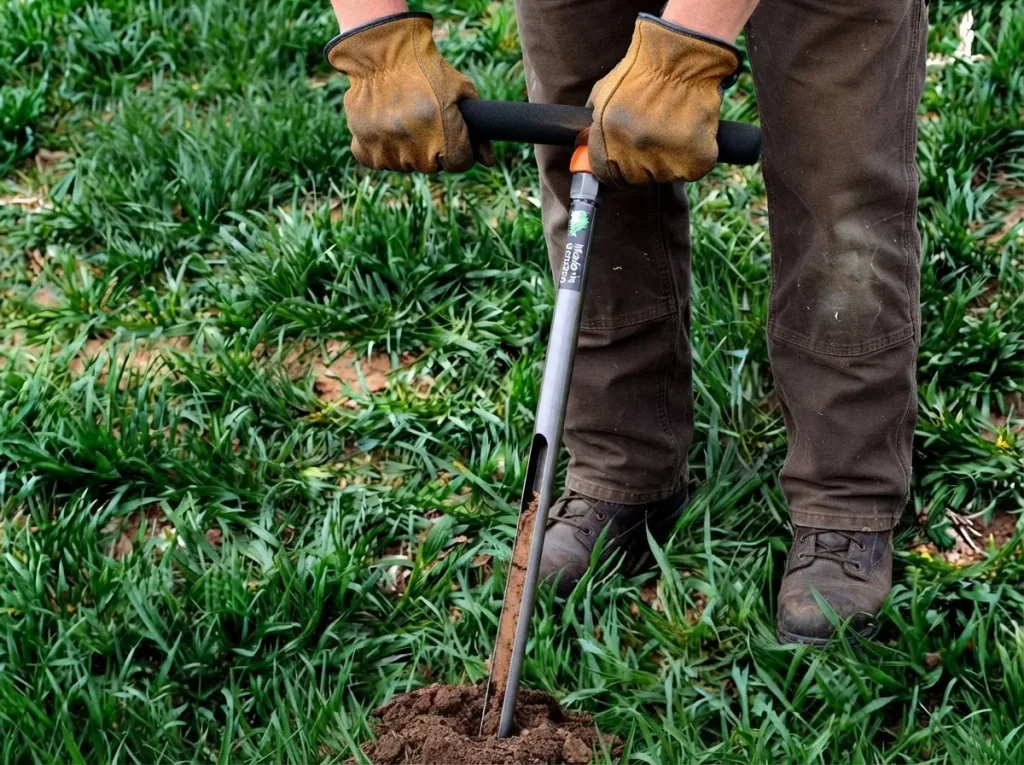
Keep outlets working and plan seasonal maintenance
Inspect filters, leaks, and emitter discharge regularly, and flush accessible line ends to clear sediment. Oregon State’s maintenance guidance explains that filtration and flushing help limit clogging.
Before freezing weather, follow the equipment manufacturer’s draining and storage instructions. For persistent uneven discharge, difficult terrain, or water-quality problems, ask an irrigation professional to assess the system before expanding it.
FAQs
How many drippers per fruit tree?
There is no universal number for drip irrigation for apple trees. Instead, choose enough outlets to wet the relevant root area, check the pattern in your soil, and expand coverage as the tree grows.
What is better for trees, a bubbler or drip line?
A bubbler can suit a basin that contains and absorbs its discharge, while distributed drip outlets allow targeted placement around roots. However, the useful comparison is infiltration and coverage at your site; neither device name guarantees appropriate watering.
What are the downsides of using drip irrigation?
Drip irrigation for apple trees requires inspection because clogged outlets, leaks, or restricted wetting can be easy to miss. Also, Penn State notes that drip systems do not provide frost protection, so they should not be mistaken for orchard frost-control sprinklers.
Related Articles
- Apple tree soil requirements: drainage and preparation
- How often to water apple trees
- Apple tree mulching
Sources
- Oregon State University Extension: Drip Irrigation, An Introduction
- Utah State University Extension: Drip Irrigation for Trees
- Utah State University Extension: The Do-It-Yourself Guide to Backyard Drip Irrigation
- Penn State Extension: Drip Irrigation for Vegetable Production, system components and limitations
- University of Minnesota Extension: Drought Monitoring and Irrigation for Apples and Grapes
- University of Minnesota Extension: Watering Newly Planted Trees and Shrubs
- Penn State Extension: Planting Pome Fruit in Home Fruit Plantings
- Oregon State University Extension: Tree Fruit presentation, irrigation check
Disclaimer: This article provides general growing guidance based on university extension research. Soil conditions, climate zone, and variety selection significantly affect results. Contact your local cooperative extension service for region-specific recommendations.